
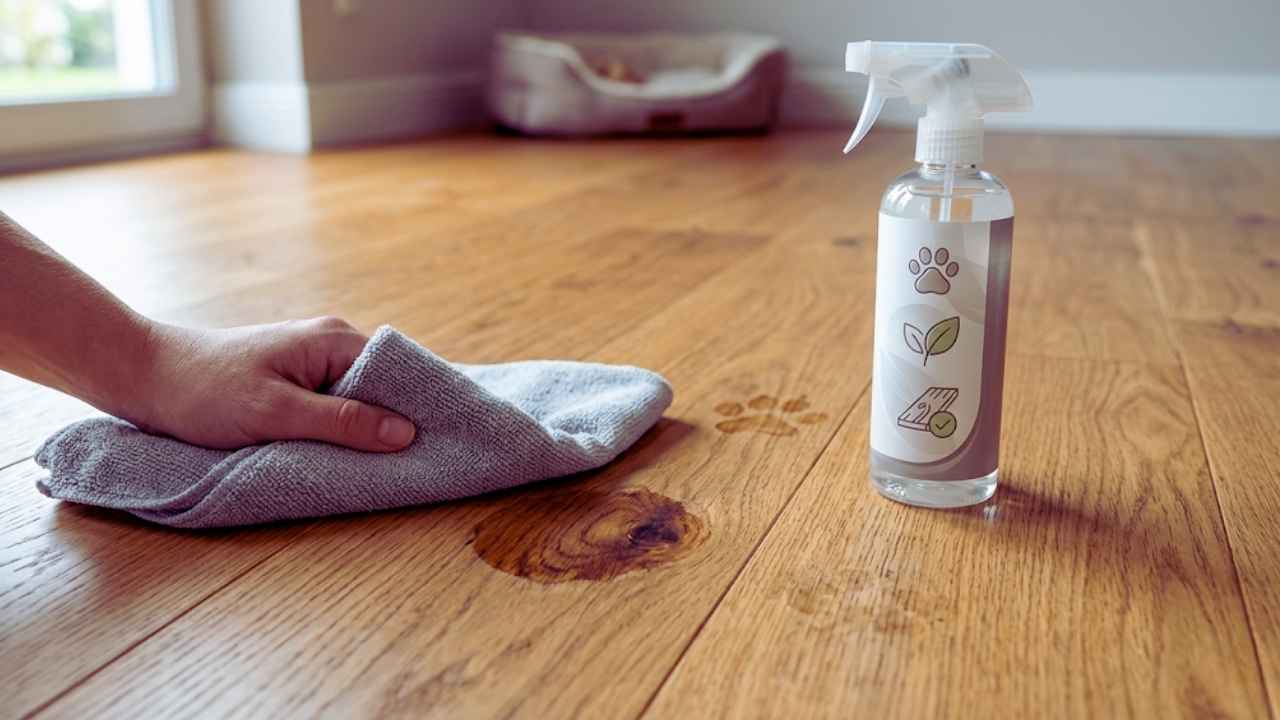
Bringing a new dog or cat into your home is a truly fantastic experience that fills your daily life with endless joy, companionship, and a little bit of beautiful chaos. However, that chaos often includes unexpected and frustrating puddles left behind on your expensive, beautiful wood surfaces. If you want to know exactly how to remove pet stains from hardwood floors without permanently ruining the delicate finish, you are absolutely in the right place.
Most homeowners immediately panic when they spot an accident and quickly grab the strongest, harshest household chemical they can find under their kitchen sink. Unfortunately, reacting this way usually strips the protective coating right off the floorboards and pushes the acidic liquid deeper into the wood grain, making the entire problem significantly worse. You do not need harsh industrial chemicals or highly toxic bleaches to save your valuable floorboards from permanent ruin.
You simply need to understand the right timing, the correct chemical reactions, and the safest extraction methods to lift the mess away. In this comprehensive guide, I will walk you through exactly what happens on a molecular level when your dog or cat has an accident indoors, and why you must treat it differently than a regular water spill. We will look at the chemical changes that turn a simple wet spot into a permanent black mark, and you will learn the absolute best household hacks and the most effective commercial products available today.
|
Introduction Highlights |
Detail Overview |
|
Core Problem |
Pet urine contains reactive acids that permanently damage wood fibers and finishes. |
|
Common Mistakes |
Using harsh chemicals, scrubbing aggressively, or ignoring dried stains entirely. |
|
Safe Solutions |
Utilizing enzymes, properly diluted natural cleaners, and specific blotting techniques. |
|
End Goal |
Restoring the visual beauty of your wood floor while completely eliminating trapped odors. |
Why Pet Stains Are Dangerous for Hardwood Floors?
Pet urine is absolutely not just plain water, and treating it like a standard spilled drink is a massive mistake that will cost you dearly. It is a highly reactive, biological liquid that drastically changes its chemical composition over time as it interacts with the air and the surrounding environment. When you leave an accident sitting on a wooden surface, it does not just harmlessly dry up and disappear into the atmosphere. It actively eats through the protective polyurethane seal that coats your flooring and aggressively attacks the raw, organic wood fibers hidden beneath that shield.
To successfully remove pet stains from hardwood floors, you must deeply understand exactly what you are fighting against on a microscopic level. Wood is naturally porous, meaning it acts like a giant, hard sponge that desperately wants to absorb any liquid it comes into contact with. Let us take a detailed look at the chemical reaction happening on your floorboards and why you absolutely cannot ignore even the smallest puppy puddle if you want to protect your home’s value.
The Science Behind Pet Urine Damage
When a dog or cat urinates, the biological liquid leaves their body in a highly acidic state that is warm and easily capable of penetrating microscopic cracks in your floor’s finish. As that liquid sits there undisturbed and begins to dry out, a massive chemical shift occurs that changes the entire situation. The acidic urine aggressively transitions into an alkaline state, producing incredibly strong ammonia compounds and highly concentrated uric acid crystals.
These alkaline compounds essentially act like a corrosive, burning solvent on your floor. They burn right through the protective polyurethane topcoat, exposing the delicate, raw wood underneath to further damage. Once the raw wood is exposed, the ammonia immediately reacts with the natural tannins present in the wood fibers, especially in popular flooring types like red oak or white oak. This chemical burn effectively changes the color of the wood from the inside out, turning it dark brown or pitch black, which is why simple surface wiping never fixes the discoloration.
Surface Stains vs. Deep Wood Penetration
Before you start pouring expensive cleaning solutions everywhere, you need to diagnose exactly how deep the liquid has penetrated into the material. Doing a quick thirty-second physical assessment can save you a massive headache and stop you from causing secondary damage. First, run your bare hand gently over the affected area to feel the texture of the wood. If the finish still feels perfectly smooth and intact, the liquid might just be resting on top of the protective seal without reaching the raw wood.
Surface issues are usually light yellow, sticky spots, or barely visible clear watermarks that can be lifted safely. However, if the finish feels rough, flaky, or completely stripped away, the protective barrier is officially destroyed and the liquid has soaked into the porous grain. Deep penetration means the ammonia has burned the fibers all the way through the thick plank, requiring much more intensive, restorative treatments to draw the stain back out.
|
Stain Severity Level |
Visual & Physical Cues |
Treatment Approach Needed |
|
Surface Level |
Light yellow, sticky residue, smooth texture. |
Quick blotting and pH-neutral surface cleaning. |
|
Finish Damage |
Cloudy, gray spots, slightly dull or rough texture. |
Deep cleaning and minor finish touch-ups. |
|
Deep Penetration |
Dark brown or pitch black, soft wood texture. |
Hydrogen peroxide poultice or professional sanding. |
|
Structural Failure |
Warped, curled edges, wide gaps, severe odor. |
Physical replacement of the floorboards and subfloor. |
Essential Supplies for Safe Stain Removal
Running blindly to the kitchen to grab whatever random dish soap or window cleaner is sitting under the sink is a terrible, highly destructive idea. Most common household cleaners contain harsh detergents, heavy degreasers, or abrasive elements that will instantly strip the beautiful shine right off your expensive wood. Using abrasive scrubbers, like heavy-duty dish sponges or steel wool, will leave permanent, visible scratches that often look far worse than the original stain itself.
You need to assemble a dedicated, floor-safe toolkit ready to go at a moment’s notice so you are never caught unprepared. Having these specific, safe items nearby means you can act immediately when an accident happens without second-guessing your methods or risking your property. You want highly absorbent materials that will gently pull the acidic liquid straight up and away from the delicate floor finish without spreading it. Here is the exact list of safe, effective tools and liquids you actually need to properly handle these messy situations without causing secondary damage to your home.
You will strictly need clean, highly absorbent white paper towels or plain white microfiber cloths, avoiding colored towels that might bleed dye onto the wet floor. You must acquire standard three percent hydrogen peroxide from your local pharmacy section, completely avoiding strong hair bleaches that will melt the wood. Grab a large jug of plain white kitchen vinegar and a fresh box of standard baking soda to utilize for safe, natural odor neutralization.
Finally, you should absolutely invest in a premium, high-quality enzymatic cleaner that explicitly states on the back label that it is completely safe for sealed hardwood surfaces. You will also need some clear plastic kitchen wrap and gentle blue painter’s tape to build targeted chemical poultices for the deeply set stains.
|
Essential Supply |
Specific Purpose |
Critical Safety Warning |
|
White Microfiber Cloths |
Gently absorbing liquid without scratching the floor. |
Never wash them with fabric softeners before use. |
|
3% Hydrogen Peroxide |
Acting as a mild bleach for dark, chemically burned wood. |
Test in a hidden closet corner before applying widely. |
|
Enzymatic Cleaner |
Digesting trapped uric acid crystals to stop odors. |
Must specifically state it is safe for sealed hardwood. |
|
White Vinegar |
Neutralizing alkaline ammonia naturally and safely. |
Must be heavily diluted with water to prevent finish damage. |
|
Baking Soda |
Drawing out microscopic trace moisture from the wood grain. |
Never scrub it aggressively; only sprinkle it lightly. |
Immediate Action: Cleaning Fresh Pet Accidents
Catching your dog or cat right in the middle of an indoor accident actually gives you a massive, distinct advantage in protecting your floor. You have exactly a critical window of a few short minutes before the warm, acidic liquid starts finding its way through the microscopic cracks in the protective finish. Your primary goal here is immediate extraction and absorption, absolutely not aggressive scrubbing or rubbing.
If you try to aggressively scrub a completely fresh puddle, you will simply force the caustic liquid straight down into the narrow, vulnerable seams between the floor planks. The faster you get the floor bone dry, the safer your beautiful wood will be from long-term, irreversible chemical burning. Most panicked homeowners fail completely at this stage because they wipe the puddle in a wide, circular motion with a wet rag. Wiping violently spreads the reactive urine across a much wider surface area, giving it significantly more opportunities to find weak spots in your floor’s finish.
To properly execute a safe extraction, you must drop a thick, heavy stack of dry paper towels directly onto the center of the puddle. Step gently on the towels with your clean shoes on to apply firm, heavy, and even pressure across the entire wet area. This direct downward weight will forcefully squeeze the towels, making them pull the liquid straight up from the floor without spreading it outward.
Keep diligently swapping out the wet, saturated towels for completely dry ones until absolutely no moisture transfers onto the fresh paper. Once the standing liquid is completely gone, lightly mist a clean microfiber cloth with a gentle, pH-neutral wood floor cleaner and dab the sticky residue. Finally, take a completely dry towel and intensely buff the spot until there is absolutely no moisture left, and sprinkle a light dusting of baking soda over it overnight.
|
Extraction Step |
Specific Action Required |
Scientific Reason Why It Works |
|
1. Direct Blotting |
Press dry towels straight down heavily. |
Pulls liquid vertically up, preventing horizontal spreading. |
|
2. Sticky Residue Removal |
Dab gently with a pH-neutral soap on a rag. |
Safely lifts remaining proteins without stripping the seal. |
|
3. Intense Buffing |
Buff the floor completely dry with a fresh towel. |
Stops lingering moisture from swelling the wood grain. |
|
4. Overnight Desiccation |
Sprinkle a very thin, dry layer of baking soda. |
Absorbs invisible trace moisture deep inside the pores. |
How to Tackle Old and Dried Pet Stains?
Sometimes you move a heavy couch or lift an old area rug and suddenly discover a horrifying, pitch-black spot staring back at you. You know instantly what happened; an accident dried there days, weeks, or even months ago, and the severe chemical reaction has already taken full effect. Basic surface wiping with soapy water will do absolutely nothing at this late stage because the damage is entirely structural and internal.
To successfully remove pet stains from hardwood floors when they are incredibly old, you have to carefully reverse the intense chemical burn that darkened the wood tannins. This requires a significant amount of patience, as you absolutely cannot fix weeks of slow chemical damage in a quick five-minute cleaning session. You have to diligently draw the deep discoloration out of the wood slowly using heavily targeted methods that treat the fibers directly beneath the ruined finish.
The Hydrogen Peroxide Method
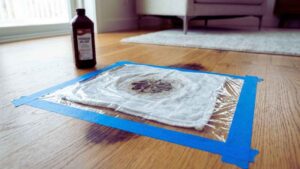
Hydrogen peroxide is truly your absolute best friend for dealing with incredibly stubborn, dark black or dark brown spots on your flooring. It acts as a highly controlled, mild wood bleach that gently lifts the darkened chemical burn without completely destroying the surrounding wood fibers. Because the peroxide needs to physically reach the raw wood to work, you might need to very lightly sand the finish off the dark spot first using fine-grit sandpaper.
Once the raw wood is exposed, soak a heavy white rag entirely in standard three percent hydrogen peroxide until it is damp, but not dripping wet. Place the damp rag directly over the black mark, cover it tightly with clear plastic wrap, and tape down the edges with painter’s tape to create a sealed bubble. Leave this chemical poultice on the floor undisturbed and check underneath it every few hours as it slowly draws the dark color out over twelve to twenty-four hours.
Using Enzymatic Cleaners on Hardwood
If the floor still smells strongly like a dirty litter box after you successfully lighten the dark stain, hydrogen peroxide alone is unfortunately not enough. You have highly concentrated, dormant uric acid crystals deeply trapped inside the microscopic pores of the wood grain. The only way to permanently destroy these stubborn, foul-smelling crystals is by using a high-quality biological enzymatic cleaner.
These advanced formulas are actually alive; they contain specifically bred beneficial bacteria that wake up when sprayed, seek out the organic urine compounds, and physically eat them. To use them correctly, spray a generous amount over the smelly area and let the liquid sit completely wet for at least fifteen to thirty minutes so the bacteria can properly digest the biological mess before you blot it dry.
|
Treatment Method |
Best Used For |
Application Strategy |
Expected Timeframe |
|
Hydrogen Peroxide Poultice |
Extremely dark black or brown tannin burns. |
Soak rag, cover with plastic wrap, seal with tape. |
12 to 24 hours of resting time. |
|
Enzymatic Soaking |
Persistent, heavy ammonia odors trapped in wood. |
Spray heavily, leave wet so bacteria can eat the urine. |
15 to 30 minutes per application. |
|
Light Sanding |
Minor surface burns or severely peeling finishes. |
Use fine-grit paper to gently expose raw wood. |
1 to 2 hours of careful work. |
|
Baking Soda Paste |
Very light, superficial surface discoloration. |
Mix with water, apply paste, let dry naturally. |
2 to 4 hours until fully dried. |
Natural vs. Chemical Cleaners: What is Safest?
Walk down any modern cleaning aisle at your local grocery store and you will immediately see dozens of colorful bottles promising absolute miracle results. Some of these products are heavily packed with harsh industrial solvents, while others proudly claim to be entirely plant-based and perfectly eco-friendly. Figuring out what is actually safe for your living room floor, and for the animals that sleep on it, can be an incredibly confusing and frustrating experience.
Making the wrong choice here could easily void your expensive flooring warranty or create a highly toxic breathing environment for your beloved pets. You do not necessarily need laboratory-grade industrial chemicals to achieve a perfectly clean, odor-free house if you act quickly.
Many common pantry staples work incredibly well if you deeply understand the science behind how to apply them correctly without causing harm. Let us closely compare the natural household routes with the heavy-duty commercial options so you can make a highly educated, safe choice for your specific home.
Vinegar and Baking Soda Solutions
Standard white kitchen vinegar is a genuinely fantastic, incredibly cheap, and completely natural way to effectively neutralize the alkaline ammonia found in dried urine. It acts as a wonderful mild disinfectant and completely cuts through lingering airborne odors beautifully when used correctly. However, you must remember that vinegar is essentially acetic acid; if you pour straight, undiluted vinegar directly onto a wooden floor, the acid will slowly eat away the polyurethane finish.
To use it safely, you absolutely must dilute it significantly by mixing exactly one-quarter cup of white vinegar into a full gallon of warm tap water. You can then dampen a very soft cloth in this diluted mixture, wipe the floor gently, and immediately follow up with a totally dry towel to prevent water damage.
Commercial Pet-Safe Options
Sometimes completely natural remedies simply lack the heavy biological power required to handle serious, deeply set messes in older homes. This is exactly where highly engineered commercial pet stain removers truly shine and prove their worth. Products that utilize advanced bio-enzymatic technology are specifically engineered in laboratories to target, break down, and digest the specific proteins and crystals found in animal waste.
When actively shopping for a commercial cleaner, you absolutely must read the back label very carefully to avoid accidentally buying anything that contains heavy ammonia. Because pet urine naturally contains high levels of ammonia, cleaning an accident with an ammonia-based floor product will actually signal to your dog or cat that this specific spot is their newly designated indoor bathroom.
|
Cleaner Category |
Major Advantages |
Major Disadvantages |
Floor Safety Rating |
|
Diluted White Vinegar |
Extremely cheap, easily accessible, neutralizes odors. |
Highly acidic, will rapidly dull finishes if not diluted. |
Safe only with heavy water dilution. |
|
Baking Soda Powder |
Perfectly absorbs moisture and traps lingering smells. |
Micro-abrasive texture can scratch glossy floor finishes. |
Safe if sprinkled very gently. |
|
Bio-Enzymatic Cleaners |
Permanently destroys hidden uric acid crystals. |
Can be quite expensive, requires long wet-sitting times. |
Safe if specifically labeled for wood. |
|
Ammonia or Bleach |
Extremely powerful, hospital-grade disinfectants. |
Highly toxic fumes, permanently destroys wood structure. |
Absolutely unsafe under any condition. |
When to Call a Professional or Replace Boards?
There is a very harsh, unfortunate truth about owning expensive wooden floors while also living with completely unpredictable indoor pets. Sometimes the biological damage is simply way too severe for any clever DIY household hack or expensive chemical spray to ever truly fix. You can patiently try every single peroxide poultice trick and heavy enzymatic spray currently available on the retail market, but it might not be enough.
If the wood remains completely soft to the touch, pitch black in color, and continues emitting a foul smell, you have to officially admit defeat. It is incredibly important to know exactly when to stop wasting your valuable time and money on cleaning supplies and start aggressively looking at physical floor repairs. Ignoring a deeply contaminated floorboard can eventually lead to widespread subfloor rotting and severe indoor air quality issues that affect your whole family.
If the dark, burned stain is relatively small and highly localized to just one or two boards, a professional flooring contractor might be able to easily save it. They can utilize heavy-duty, commercial floor sanders to aggressively grind past the thick protective finish and get deep down into the uncontaminated bare wood. From there, they use highly dangerous, professional-grade wood bleach—which is significantly stronger than pharmacy peroxide—to aggressively strip the dark color completely out of the natural grain.
However, if the urine pooled heavily in one spot for several weeks, it most likely soaked completely through the thick hardwood planks and heavily saturated the structural plywood subfloor underneath. In these truly catastrophic cases, no amount of surface sanding or bleaching will ever fix a deeply contaminated, rotting subfloor. A skilled carpenter must physically cut out the ruined wooden planks, chemically treat or fully replace the damaged subfloor, and expertly weave brand-new hardwood boards into your existing floor layout to permanently remove the biological hazard.
|
Damage Indicator |
Recommended DIY Fix |
Professional Action Required |
|
Light, clear surface spot |
Diluted vinegar wipe or light enzymatic spray. |
None required. |
|
Dark spot on solid wood |
24-hour hydrogen peroxide poultice application. |
Deep professional sanding and chemical bleaching. |
|
Persistent airborne odor |
Repeated, heavy liquid enzyme soakings. |
None, unless subfloor is deeply penetrated. |
|
Soft, crumbling black wood |
None; wood structure is entirely destroyed. |
Cut out damaged boards and install replacements. |
|
Smell returns when humid |
None; crystals are trapped in the subfloor. |
Full replacement of boards and subfloor treatment. |
Tips to Protect Your Hardwood Floors from Future Messes
The absolute best, most cost-effective way to manage expensive pet damage is to diligently prevent it from ever reaching your beautiful hardwood in the first place. You undoubtedly spent very good money installing your flooring, and taking just a few smart, proactive steps today can easily save you thousands of dollars in future repairs. Prevention is always significantly cheaper and far less stressful than going through a massive home restoration process.
You simply need to change a few basic household habits and invest in a few clever protective barriers to keep your home safe. Start by taking a very close look at your pet’s daily feeding and watering station in the kitchen or hallway. Dogs are notoriously messy drinkers, and heavy water splashing onto the floor multiple times a day will eventually wear down and destroy the protective finish over time.
Place a thick, completely waterproof silicone mat underneath all food and heavy water bowls to perfectly catch the daily spills and provide a highly safe, impenetrable barrier for your wood. If you are actively potty training a brand new puppy, absolutely do not put thin training pads directly onto the bare floor under any circumstances. Urine frequently leaks right off the unprotected edges or aggressively soaks completely through the flimsy bottom layer of cheap training pads.
Always place your puppy pads securely inside a shallow, hard plastic tray with raised edges to perfectly catch any unpredictable liquid runoff. Furthermore, you must meticulously maintain your pet’s nails, as long, sharp claws quickly create thousands of microscopic scratches in the top layer of your floor’s polyurethane finish. Finally, strategically place thick, easily washable runner rugs in busy hallways or highly trafficked areas where your pets aggressively run and spend the majority of their daily time.
|
Preventive Measure |
Initial Cost Level |
Required Effort Level |
Long-Term Protective Benefit |
|
Silicone Bowl Mats |
Very Low |
One-time, easy setup. |
Completely stops daily water rot and finish degradation. |
|
Hard Plastic Potty Trays |
Low |
One-time, easy setup. |
Prevents acidic urine from leaking through training pads. |
|
Regular Nail Trimming |
Medium |
Ongoing weekly maintenance. |
Stops deep scratches that constantly break the floor’s seal. |
|
Washable Area Rugs |
Medium |
One-time placement. |
Acts as a highly sacrificial layer for heavy foot traffic. |
|
Re-coating Floor Finish |
Very High |
Every 5 to 7 years. |
Perfectly maintains the waterproof, protective chemical barrier. |
Final Thoughts
Living with pets means accepting that messes are going to happen. But those messes do not have to result in permanent property damage. Knowing how to remove pet stains from hardwood floors quickly and effectively gives you peace of mind. By avoiding harsh industrial bleaches and abrasive scrubbers, you protect the delicate finish that keeps your wood safe.
Remember that time is your biggest factor. Blot up fresh puddles immediately, use heavily diluted vinegar for quick cleanups, and rely on quality enzymatic cleaners to destroy odors at their source. For those stubborn, dark spots, a hydrogen peroxide poultice can perform miracles if you are patient. And if the damage is truly beyond repair, do not hesitate to call in a flooring professional to replace the affected boards. With the right tools and a solid prevention strategy, you can enjoy both your beautiful home and the animals that make it special.
Frequently Asked Questions (FAQs) About Remove Pet Stains Hardwood
Will baking soda scratch my hardwood floors?
Baking soda is a naturally mild, microscopic abrasive powder that can definitely cause friction damage. If you actively rub it aggressively directly into the floor surface with a hard scrub brush or rough sponge, it can very easily dull or completely scratch the topcoat finish. It is always significantly safest to simply sprinkle the dry powder very gently over the damp area, patiently let it absorb the hidden moisture over a few long hours, and then gently vacuum it up using a highly soft, non-abrasive brush attachment.
Can I use a steam mop to clean pet urine?
You should absolutely never, under any circumstances, use a high-heat steam mop on a fresh or dried pet urine stain. The extreme, intense heat generated by the mop will instantly and permanently bond the biological proteins found in the urine directly to the raw wood fibers, effectively setting the stain permanently. Furthermore, the aggressive steam will forcefully push the foul, gaseous odor incredibly deep into the microscopic pores of the wood grain, making it virtually impossible to ever fully remove it later without replacing the boards.
How do I know if my hardwood floor seal is still intact?
You can easily perform a very quick, highly effective water drop test to check your floor’s protective health. Gently drop a very small, single spoonful of plain tap water directly onto a discrete, hidden area of your floor. If the water immediately beads up tightly into a distinct, high droplet, your protective polyurethane seal is highly strong and intact. If the water quickly spreads out entirely flat or immediately soaks directly into the dark wood grain, your protective finish has completely worn away over time and desperately needs to be fully reapplied to prevent rot.
Why does my floor still smell after cleaning it?
If the incredibly foul smell stubbornly persists for many days after aggressive cleaning, the acidic liquid most likely soaked heavily through the narrow, unsealed seams between the floorboards and deeply penetrated the highly porous plywood subfloor underneath. Standard surface liquid cleaners simply cannot physically reach the deeply hidden subfloor structure to neutralize the issue. You will absolutely need to heavily pour a liquid enzymatic cleaner so it can physically soak all the way down into those deep seams, or in highly severe, rotting cases, remove and completely replace the affected flooring entirely.
Will homeowner’s insurance cover pet damage to floors?
In the vast majority of standard, modern homeowner insurance policies, physical damage caused by your own domestic pets, specifically including severe urine damage, deep scratching, or chewing, is heavily considered a basic home maintenance issue and is explicitly excluded from any financial coverage. Insurance typically only covers highly sudden, truly accidental, and catastrophic events like massively burst plumbing pipes or severe storm damage, absolutely not slow, gradual, daily damage from a household animal living indoors.