
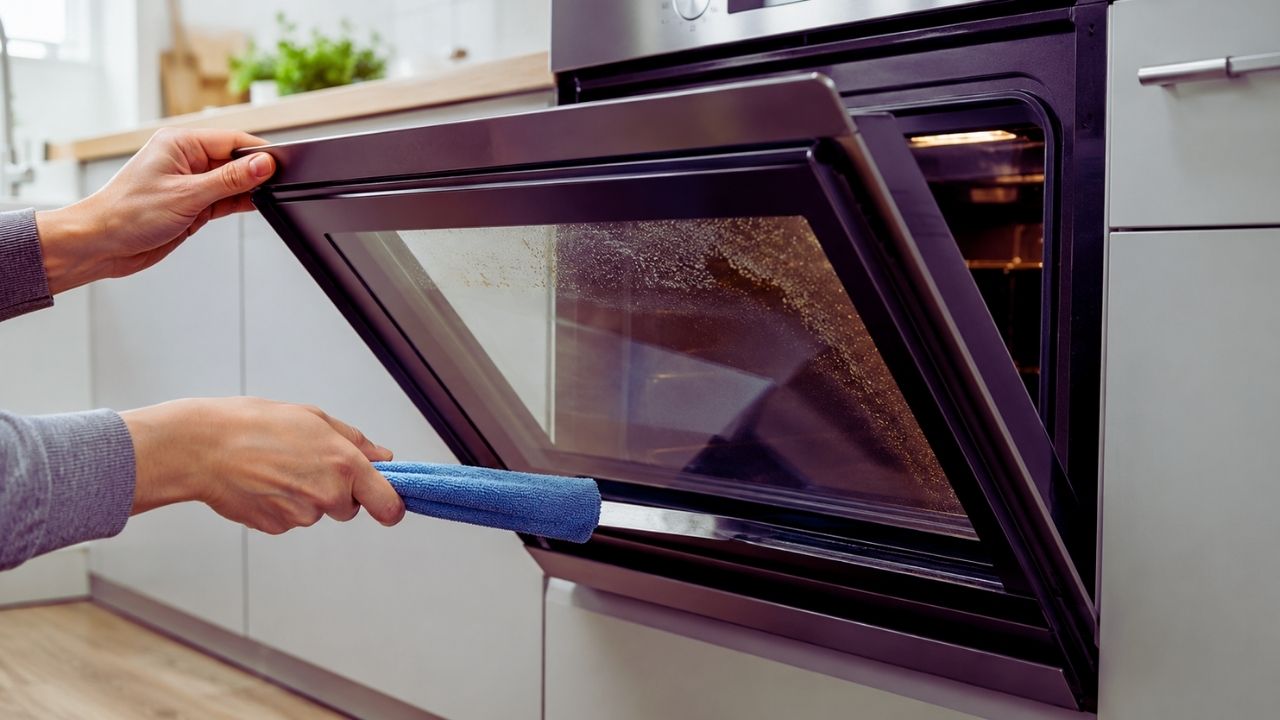
You just spent two solid hours scrubbing your kitchen. The counters shine perfectly. The floors are freshly mopped. Then, you look over at your oven. You wipe down the outside panel and scrub the inside cavity until it sparkles.
But right there, staring back at you, is a cloudy, brown, greasy mess trapped right in the middle of the glass panels. You try to wipe it, but the dirt sits completely out of reach. It drives me crazy, and I know it frustrates you too. Getting rid of those trapped streaks feels absolutely impossible unless you pay a repair tech a hefty fee just to look at it.
But you can tackle this chore at home for free. You just need a few basic items, a bit of patience, and the right trick to clean between oven glass. I will walk you through the exact methods to clear out that trapped grease and get your oven window looking brand new again, without breaking anything or losing your mind in the process.
The Anatomy of an Oven Door: Why Dirt Gets Trapped?
The necessity of air vents in modern appliances
Oven doors look sealed tight from the outside, but they actually sit wide open at the top and bottom. Manufacturers deliberately design them with specific open air vents. These ventilation slots let cool air circulate between the multiple layers of glass while you cook. Modern convection ovens often pack three or four glass panes to keep the heat inside.
Without that constant airflow, the intense baking heat would shatter the outer glass instantly, putting you and your family at risk. So, the vents do an amazing job of keeping the outside glass safe to touch. But air is not the only thing getting inside. Whenever you cook, dust, floating pet hair, and airborne particles get sucked right into those same ventilation slots. Over time, all that debris settles directly onto the inner glass surfaces.
|
Component |
Primary Function |
Hidden Drawback |
|
Top Door Vents |
Releases trapped hot air from the glass gap. |
Acts as a funnel for spilled liquids and cleaning sprays. |
|
Bottom Door Vents |
Pulls in cool floor air to regulate temperatures. |
Sucks in dust bunnies, pet hair, and floor debris. |
|
Multi-Pane Glass |
Insulates the extreme internal oven heat. |
Creates a hollow trap that makes cleaning incredibly difficult. |
How cooking grease turns into a severe fire hazard?
When a pot boils over, liquid runs down the inside door and drips straight into the bottom slots. When you roast at high temperatures, vaporized cooking oils float right down into those gaps. The heat then bakes these particles onto the inner glass. This is not just an ugly cosmetic issue; it represents a serious fire risk. Current insurance data shows cooking fires account for nearly half of all reported home fires annually, causing over one billion dollars in property damage.
Furthermore, fifty-one percent of all kitchen fires are fueled by built-up cooking oil, fat, or grease. Range hoods and oven vents accumulate this grease over time. If a spark or high-heat flare-up reaches that trapped, baked-on grease inside your door, it can ignite instantly. Keeping that glass gap clean actually protects your home from disaster.
|
Fire Risk Factor |
Impact on Kitchen Safety |
Preventive Action |
|
Trapped Vaporized Oils |
Highly flammable residue coats the internal glass panes. |
Clean between oven glass twice a year minimum. |
|
Baked-On Food Spills |
Creates a carbon fuel source near extreme heat elements. |
Wipe up major oven spills immediately after cooking. |
|
Unattended High Heat |
Sparks can easily ignite built-up grease inside the vents. |
Never leave frying or broiling food completely unattended. |
Essential Tools You Need for the Job
Choosing the perfect reaching tool
Forget buying expensive commercial cleaning gadgets that promise to make appliance maintenance effortless. You already own the best tool for this job, sitting right in your closet or garage. You just need something long, thin, and highly flexible to slide up through the door vents. A standard wooden yardstick or a straightened wire coat hanger works perfectly for this specific task.
Even a cheap plastic fly swatter does an amazing trick because the handle bends easily without snapping under pressure. If you choose a wire hanger, you have to untwist the neck completely and straighten the metal wire out. Leave a small flat hook at one end so your wiping cloth does not slip off. A yardstick provides more leverage for scrubbing, but it might be too thick for ultra-slim modern doors.
|
Reaching Tool Option |
Best Feature |
Potential Drawback |
|
Wire Coat Hanger |
Extremely flexible and bends to reach tight corners. |
The sharp metal tip can scratch the glass if exposed. |
|
Wooden Yardstick |
Very sturdy and allows you to push hard on stains. |
Too thick to fit into narrow modern oven door vents. |
|
Plastic Fly Swatter |
Perfect mix of handle flexibility and flat surface area. |
The handle length might fall short for very deep oven doors. |
Why microfiber beats paper towels every time?
You need a reliable wiping material to attach to your reaching stick. Grab a thin microfiber cleaning cloth for this job. Microfiber naturally catches fine dust and thick grease without leaving annoying lint behind. Whatever you do, absolutely do not use paper towels. Paper towels tear apart easily when they get wet and snag on the rough edges inside the door frame.
If a paper towel rips while you push it up the vent, you will leave a shredded paper mess stuck permanently inside your door. You also need three or four heavy-duty rubber bands. You must secure the microfiber cloth tightly to your stick. If the cloth falls off while buried deep inside the oven door, getting it back out requires an incredibly frustrating rescue mission.
|
Wiping Material |
Effectiveness on Grease |
Risk of Getting Stuck |
|
Microfiber Cloth |
Excellent; grabs grease and traps dust completely. |
Very Low; woven fabric stays together under pressure. |
|
Cotton Washcloth |
Good; scrubs hard stains effectively. |
Medium; often too thick to fit through narrow vents. |
|
Paper Towels |
Poor; smears grease and leaves heavy lint. |
Very High; shreds instantly when damp and snagged. |
Preparing the Best Homemade Cleaners
Skip the harsh, store-bought chemical oven cleaners for this specific project. Heavy commercial foams require intense rinsing with clean water to remove the toxic residue. You cannot easily rinse chemical foam out of a tiny glass gap using a coat hanger. If you leave that corrosive stuff behind inside the door, it literally emits toxic fumes the next time you bake a pizza or roast a chicken.
Real-time safety data indicates that burning leftover cleaning chemicals inside an oven contributes heavily to poor indoor air quality and respiratory irritation. These chemicals also degrade the internal metal components of your door over time. You want a solution that cleans perfectly without leaving any dangerous residue behind, which is why natural pantry ingredients are always your safest bet.
|
Cleaning Product Type |
Chemical Hazard Level |
Rinsing Difficulty |
|
Commercial Foam Cleaners |
High; leaves toxic, flammable residue behind. |
Extremely Difficult; requires gallons of water to clear. |
|
Ammonia-Based Sprays |
High; emits strong respiratory irritants when heated. |
Difficult; leaves a sticky film if not buffed properly. |
|
Natural DIY Degreasers |
Zero; completely food-safe and non-toxic. |
Very Easy; wipes away cleanly with a simple damp cloth. |
Natural degreasers that actually work

Stick to simple, natural degreasers that you probably already have in your kitchen sink. For light, everyday grease, mix a cup of warm water with three drops of a heavy-duty dish soap like Dawn. Dealing with heavy, baked-on grime that has sat there for months? Mix half a cup of plain baking soda with three tablespoons of warm water to make a thick, spreadable paste.
Baking soda acts as a mild abrasive that lifts grease without scratching delicate surfaces. If your glass just looks cloudy from hard water spots and everyday dust, plain white vinegar is all you need. Vinegar cuts through cloudy film instantly and dries completely streak-free. I always keep a spray bottle of fifty-fifty vinegar and water handy for quick appliance touch-ups.
|
Homemade Solution |
Best Used For |
The Exact Recipe |
|
Baking Soda Paste |
Heavy grease splatters and rock-hard baked food. |
Half a cup baking soda plus three tablespoons warm water. |
|
Dish Soap Mixture |
Light cooking grease and fresh food spills. |
One cup warm water plus three drops heavy-duty dish soap. |
|
White Vinegar Spray |
Cloudy glass, hard water spots, and light dust. |
Equal parts distilled white vinegar and warm tap water. |
How to Clean Between Oven Glass Without Disassembly?
If taking apart a heavy kitchen appliance makes you nervous, start with the simple yardstick hack. First, you have to locate the actual entry vents. Open your oven door slightly and look straight down along the bottom edge. If you do not see ventilation slots underneath, check the top edge right where the door meets the handle. Some modern freestanding ovens make this slightly tricky.
You often need to pull out the bottom warming drawer entirely and set it aside to reach the bottom door vents from underneath. Get down on the floor with a good flashlight and inspect the gaps. Once you spot the openings, you will immediately see exactly how much dust and pet hair has gathered at the entryway.
|
Vent Location |
Oven Type |
How to Access the Slots |
|
Bottom Edge |
Standard Freestanding Ovens |
Remove the bottom warming drawer and look upward. |
|
Top Edge |
Built-In Wall Ovens |
Open the door slightly and look beneath the handle. |
|
Side Grooves |
Specialty Convection Models |
Open the door fully and inspect the inner side panels. |
Building the cleaning wand correctly
Now that you found the entry point, you will build your homemade cleaning wand. Wrap your microfiber cloth tightly around the hooked end of your hanger or the flat end of your yardstick. You must secure it firmly with three or four heavy rubber bands. I cannot stress this enough; do not skip the rubber bands.
Once the cloth is secure, lightly dampen it with your dish soap solution or vinegar. If the cloth drips, dirty water runs down the inside of the glass, creating much worse streaks than you started with. Keep the fabric slightly moist, never soaking wet. A dripping wet cloth just pushes muddy water into the corners where you can never reach it.
|
Wand Construction Step |
Crucial Detail |
Why It Matters |
|
Secure the Cloth |
Wrap tightly and use multiple thick rubber bands. |
Prevents the fabric from getting lost inside the door gap. |
|
Apply the Cleaner |
Dampen the cloth lightly; squeeze out excess liquid. |
Stops dirty water from pooling at the bottom of the glass. |
|
Test the Grip |
Pull on the cloth hard before inserting the wand. |
Ensures the rubber bands are actually holding tension. |
Scrubbing and buffing to avoid hard water spots
Slide the wand slowly up through the vent slots. Push it gently upward. Shine a bright flashlight through the front of the glass so you can spot the hidden grease streaks. Scrub the dirty spots side to side with steady pressure. Work your way from the top of the door down to the bottom, ensuring any dirty liquid runs downward toward your exit point.
Once the dirt is completely gone, pull the wand out and ditch the wet cloth. Attach a brand new, completely dry microfiber cloth. Reinsert the wand and buff the entire glass pane dry. Leaving the glass damp causes cloudy condensation and permanent hard water stains once the oven heats up again.
|
Scrubbing Phase |
Action Required |
Expected Result |
|
Initial Insertion |
Slide wand gently; do not force it if it sticks. |
Safely enters the glass cavity without breaking the panes. |
|
Spot Cleaning |
Use a flashlight and scrub side to side on stains. |
Breaks down baked-on grease using friction and soap. |
|
Final Buffing |
Swap for a dry cloth and wipe away all moisture. |
Prevents annoying condensation and hard water marks. |
How to Remove and Disassemble the Oven Door?
Locking the hinges for safety
Sometimes, a hanger simply does not cut it. If a massive pie spill dumped sticky sugar down the vents years ago, a damp cloth on a stick just smears it around. To really clean between oven glass, you have to take the door apart. It sounds scary, but brands design modern ovens for incredibly easy maintenance.
First, open the door fully. Find the metal hinge locks on both sides near the bottom frame. Pry them down toward you with a flathead screwdriver. This action locks the heavy-duty springs safely in place. If you forget to lock the hinges, they can snap shut violently and crush your fingers or shatter the glass completely. Safety always comes first with heavy appliance repair.
|
Safety Step |
Action Required |
Consequence of Skipping |
|
Read the Manual |
Locate the specific hinge locks for your brand. |
You might pry the wrong component and break the door. |
|
Fully Open Door |
Push the door down flat before touching hinges. |
The locking latches will not engage properly on an angle. |
|
Lock the Latches |
Use a flathead screwdriver to flip latches down. |
Unlocked hinges will snap shut and cause severe injury. |
Removing the frame to access the glass
Removing the door is a two-person job because the thick tempered glass makes it surprisingly heavy. Close the door to about a seventy-five-degree angle. Grip both sides firmly and lift straight up and out of the hinge slots. Have someone help you carry it to a sturdy kitchen table covered with a thick towel.
Lay the door face-down. Find the screws holding the metal frame together. These usually sit along the top edge or bottom corners. Take them out and put them in a small bowl so they do not roll away. Carefully lift the inner metal door assembly away from the outer glass frame. You now have one hundred percent unrestricted access to clean the glass panes properly.
|
Disassembly Step |
Required Action |
Pro Tip for Success |
|
Lift the Door |
Pull up at a seventy-five-degree angle to release. |
Keep your back straight; the door weighs over thirty pounds. |
|
Protect the Table |
Lay a thick moving blanket or towel down first. |
Prevents scratching your dining table and the outer glass. |
|
Remove Screws |
Take out the perimeter frame screws carefully. |
Use the correct Torx or Phillips bit so you do not strip them. |
Cleaning the exposed glass and reassembling
With the glass fully exposed, wear work gloves because the raw glass edges feel razor-sharp. Apply your baking soda paste directly to the heavy stains, scrub them away, rinse with a damp cloth, and dry the panel completely. Once the glass shines perfectly, lay the metal frame back over the glass and replace the screws.
Tighten them firmly, but never overtighten them. If you crank the screws too hard, the glass expands under baking heat and cracks instantly. Slide the door back onto the oven hinges at a seventy-five-degree angle. Push it down fully flat, flip the hinge locks closed, and carefully shut the door.
|
Reassembly Task |
Crucial Detail |
Why It Matters |
|
Deep Cleaning |
Scrub the fully exposed glass with baking soda. |
Erases years of hard, baked-on grease in minutes. |
|
Replacing Screws |
Snug the screws tight, but do not over-torque. |
Overtightened screws cause the glass to shatter under heat. |
|
Resetting Hinges |
Slide door back on at an angle and flip locks up. |
Secures the door safely so it does not fall off during baking. |
Why Self-Cleaning Cycles Make Glass Stains Worse?
The extreme heat bakes the grease permanently
Do not rely on the self-cleaning cycle to fix dirty glass. It absolutely will not work, and it usually makes the stains way worse. The self-cleaning function locks your appliance and cranks the temperature to over nine hundred degrees Fahrenheit. This burns loose food into white ash inside the main oven cavity.
However, the door glass simply does not get hot enough to turn liquid grease into ash. Instead, that extreme heat bakes the sticky liquid grease permanently into the microscopic pores of the glass itself. It turns a soft, wipeable splatter into a rock-hard brown resin. Once that happens, standard dish soap will never touch it again.
|
Temperature Effect |
What Happens Inside the Cavity |
What Happens on the Glass |
|
Normal Baking Heat |
Cooks food and splatters grease around. |
Keeps grease soft and wipeable on the glass panels. |
|
Self-Cleaning Heat |
Incinerates loose food scraps into white ash. |
Bakes liquid grease into a permanent, hard resin on glass. |
|
Post-Cycle Cooling |
Ash sweeps out easily with a damp rag. |
Stains require a razor blade and heavy scraping to remove. |
The risk of structural damage and toxic fumes
Beyond ruining your glass, running a self-cleaning cycle over heavy grease presents massive risks. National statistics show that forty-nine percent of home fires involve cooking equipment mishaps, including overheating grease during self-cleaning modes. If you leave a thick layer of grease inside those door vents, the intense heat will cause the grease to smoke heavily.
This fills your home with thick, toxic smoke that triggers fire alarms and irritates your lungs. Furthermore, extreme high-heat cycles routinely blow out internal thermal fuses, requiring an expensive repair visit. Always wipe down the glass manually and clean between oven glass before you ever run a high-heat self-cleaning cycle.
|
Hazard |
Cause During Self-Cleaning |
Preventive Solution |
|
Toxic Smoke |
Burning massive amounts of trapped door grease. |
Manually clean all grease off the glass before starting. |
|
Blown Fuses |
Extreme heat overloads the electronic control board. |
Use the low-heat steam clean function instead of high heat. |
|
Grease Fires |
Trapped oil reaches its auto-ignition temperature. |
Never run the cycle if heavy grease is visible inside the door. |
Preventive Habits to Keep Vents Clear
Adjusting how you wipe down the exterior
Once you clear the grime, you definitely want to keep it that way. A few simple habits stop dirt from getting into those vents in the first place. First, change exactly how you clean the oven door exterior. Never spray liquid glass cleaner directly onto the door itself.
Gravity pulls the liquid down immediately, and it drips right into the top vents before you can even grab your towel. It happens in seconds. Always spray your cleaner directly onto the microfiber cloth first while standing away from the appliance, then wipe the door. This entirely eliminates the risk of liquid running down into the hidden gaps.
|
Bad Habit |
The Result |
The Better Alternative |
|
Spraying the Door |
Cleaner runs down and pools in the top vents. |
Spray the microfiber cloth while holding it over the sink. |
|
Dry Dusting |
Pushes dust particles straight into the air slots. |
Wipe the exterior with a damp cloth to trap the dust. |
|
Using Heavy Soap |
Leaves a sticky film that attracts massive dust. |
Use a vinegar solution that dries perfectly clean and clear. |
Stopping heavy spills before they happen
Watch out for aggressive boil-overs, too. When you bake a bubbling casserole, a juicy fruit pie, or a greasy roast, put a heavy baking sheet on the rack directly below the dish. This simple tray catches spills before they hit the oven floor. When grease hits the scorching hot floor, it creates thick smoke.
That greasy smoke travels right up into the door vents and coats the internal glass panes. Stopping the spill stops the smoke. Additionally, if you see a spill on the inner glass while cooking, wipe it up immediately after the oven cools down to a safe temperature. Do not let gravity pull the liquid into the bottom vents.
|
Spill Type |
How It Ruins the Glass |
How to Prevent It |
|
Bubbling Fruit Pies |
Sugary liquid burns and creates massive smoke. |
Place a foil-lined baking sheet on the rack below the pie. |
|
Splattering Roasts |
Airborne grease coats the entire door interior. |
Use a specialized roasting bag to contain all the grease. |
|
Liquid Soups |
Drips down the glass and pools in bottom slots. |
Wipe the inner door glass immediately once cooled. |
Final Thoughts
Taking a few focused minutes to clean between oven glass gives your entire kitchen an instant, massive facelift. It turns a dirty, neglected appliance back into a sleek, gorgeous centerpiece you actually want to cook with every day. Whether you slide a homemade yardstick wand through the bottom vents for a quick ten-minute fix or take the door entirely off for a deep, satisfying scrub, the physical effort pays off immediately.
Prioritize your personal safety above all else, take your time carefully locking those hinges, and stick exclusively to natural degreasers. Follow these straightforward steps, and you will never have to stare at a streaky, grease-stained window ever again. Ensure you maintain these habits, and your kitchen will always stay looking its absolute best.
Frequently Asked Questions (FAQs) About Clean Between Oven Glass
Can I use a Magic Eraser on the oven glass?
No. Magic Erasers are made of melamine foam, which acts like microscopic sandpaper. It easily leaves permanent, cloudy micro-scratches all over your glass.
Why is there a third piece of glass in my oven door?
Modern convection ovens use three (sometimes four) panes of glass for maximum insulation. It keeps the outside cool to the touch, even when the inside hits 900°F.
Can I use a steam cleaner inside the oven vents?
Never blast steam into the door vents. The condensation gets trapped between the glass panels. It takes days to evaporate and leaves terrible hard water spots behind.
What if the glass is stained brown, not just greasy?
Apply a baking soda paste for 30 minutes. If that fails, wet the glass and gently scrape with a wet pumice stick. Never use a dry pumice stick, or you’ll scratch the surface.