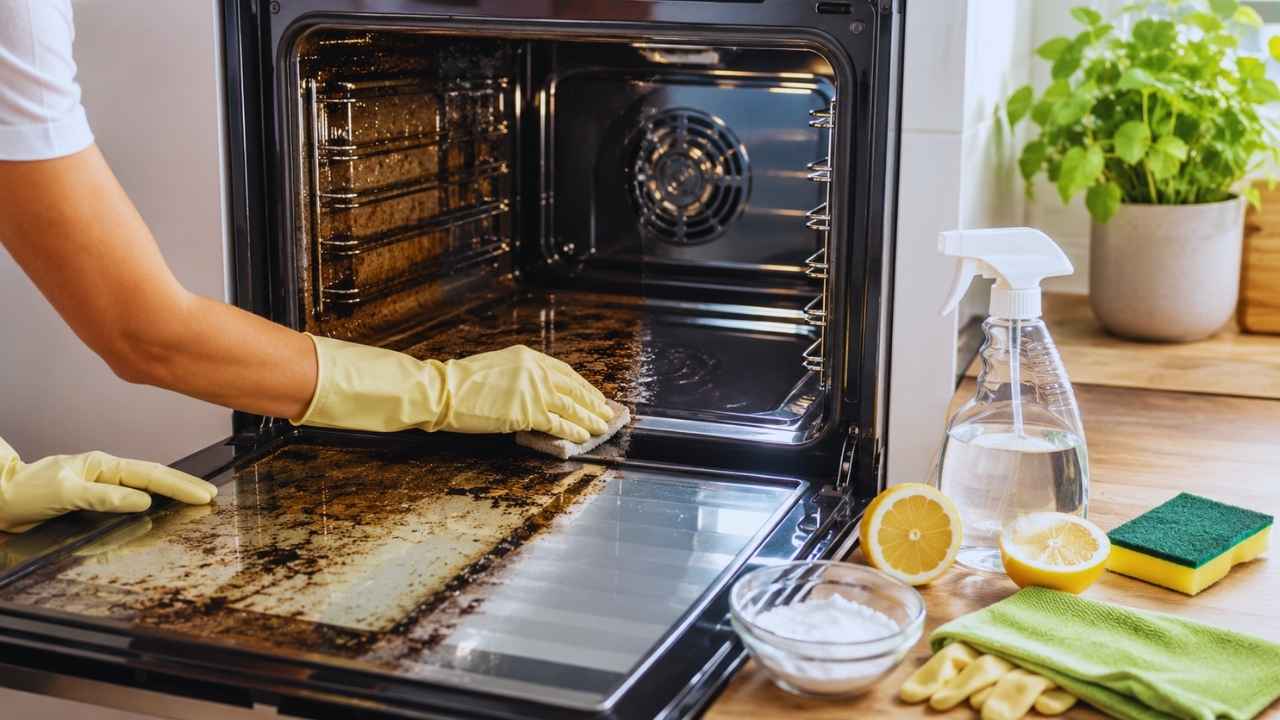
Picture this scene. You are hosting a dinner party and you pop a roast in to cook. Ten minutes later, your smoke alarm is screaming. Your kitchen looks like a foggy morning. I used to think this was just a normal part of cooking. It is not normal at all. It actually means your appliance is secretly harboring a thick, hidden layer of burnt grease.
Ignoring these spills is not just lazy behavior. It is actually incredibly dangerous for your entire home. Every single time you preheat your appliance, you bake that old grease closer and closer to its flash point.
Here is a wild statistic I found from recent fire safety reports. Cooking causes about half of all reported home structure fires in the United States. In 2024 alone, fire departments responded to hundreds of thousands of residential fires. The scariest part involves the actual fuel source. The initial fuel in over half of those cooking fires is leftover cooking fat and grease. When old grease overheats, it catches fire ridiculously fast. These grease fires cause over a billion dollars in direct property damage every single year.
Keeping things wiped down is not just about making your kitchen look pretty. When you clean an oven naturally, you remove the exact fuel that starts most house fires. You protect your family, your pets, and your property. You also stop your food from tasting like burnt carbon. A spotless kitchen is a safe kitchen.
|
Fire Safety Facts |
The Hard Truth |
|
Leading Cause |
Cooking starts nearly 50 percent of US home fires. |
|
Primary Fuel |
Grease and fat ignite first in most cooking fires. |
|
The Cost |
Cooking fires cause over $1.2 billion in damage yearly. |
|
High Risk Days |
Thanksgiving and Christmas see massive spikes. |
Why I Ditched the Chemical Sprays?
Walk down the cleaning aisle at the grocery store. Pick up a can of heavy-duty degreaser and read the back label. You will see toxic ingredients like sodium hydroxide, butane, and methylene chloride. Sodium hydroxide is also known as lye. It is wildly corrosive. If a single drop hits your bare skin, it causes a chemical burn almost instantly. It literally turns the oils in your skin into soap. The butane propellant inside those aerosol cans fills your indoor air with harsh compounds. I remember using a commercial spray once and coughing for an hour straight.
I finally got sick of my food tasting like chemicals. I found a white chemical film left behind a week after using a spray. When I turned the heat on, that toxic residue vaporized right into the pizza I was baking. Chemical cleaners also contain things like ethylene glycol. That is the exact same chemical used in car antifreeze. Breathing in these fumes causes serious respiratory irritation and dizziness. It is especially dangerous if you have asthma, young kids, or pets in the house.
Going the natural route takes a bit more waiting time, but it requires zero extra scrubbing. You get to breathe easy knowing your food is safe. You also stop washing highly toxic solvents down the drain and into the local water supply. Natural ingredients cost pennies compared to expensive spray cans.
|
The Matchup |
Commercial Sprays |
Natural Pantry Methods |
|
Active Ingredients |
Lye, butane, methylene chloride |
Baking soda, vinegar, lemons |
|
Health Risks |
Skin burns, breathing trouble |
Totally safe, edible ingredients |
|
Ventilation |
Needs open windows and fans |
None needed |
|
Cost |
Expensive aerosol cans |
Pennies per clean |
The Pantry Staples You Need
You do not need to buy anything special to cut through years of thick grease. You just need to leverage basic middle-school science. Baking soda is a mild base with a pH of around 8.4. Animal fats and cooking oils are highly acidic. When you mix them together, the baking soda neutralizes the baked-on grease. It triggers a chemical reaction called saponification. This process physically turns those stubborn fat molecules into a water-soluble soap. That soapy sludge just wipes right off the enamel without heavy scrubbing.
White vinegar acts as the perfect chemical partner. Vinegar is made of acetic acid. When you spray it directly onto leftover baking soda, it neutralizes the powder instantly. This reaction creates a massive release of carbon dioxide gas. Those rapidly expanding gas bubbles act like microscopic scrub brushes. They force the trapped dirt out of the tiny pores in your metal walls. Unlike bleach, mixing these two pantry staples never creates dangerous chlorine gas.
You only need a few basic tools to make this work. Grab a silicone spatula to chip off the worst burnt crusts. A silicone tool guarantees you will not scratch your expensive enamel interior. Grab a stack of clean microfiber cloths or cotton terry towels to trap the dirt. You also need an empty spray bottle for the vinegar.
|
Your Tool Kit |
What It Actually Does |
|
Baking Soda |
Neutralizes grease and triggers saponification. |
|
White Vinegar |
Makes the powder foam and cuts final residue. |
|
Fresh Lemons |
Creates steam to lift light splatters. |
|
Silicone Spatula |
Chips off burnt food without scratching metal. |
|
Cotton Cloths |
Grabs the dirt and wipes away the powder. |
Prepping for the Deep Scrub
Do not just start throwing baking soda everywhere inside your kitchen. You need to prep the space properly first. Make absolutely sure everything is completely cool to the touch. You want the interior temperature below 100 degrees Fahrenheit. Metal expands when it gets hot. If you apply wet paste to hot enamel, it can penetrate micro-cracks and damage the finish over time. Take out the metal racks, the pizza stone, and any leftover foil. Put the racks directly into your bathtub for later.
Next, grab your plastic or silicone spatula. Gently chip away at the big, burnt crusts sitting on the bottom floor. Sweep those loose crumbs out with a damp paper towel. You can also use a vacuum cleaner hose attachment to suck up the debris in seconds. If you skip this dry scraping step, your cleaning paste wastes all its power on loose dirt. You want the alkaline paste focused entirely on the baked-on stains.
Always double-check your safety features before starting. If you have a gas model, confirm the pilot light is off. Locate the gas vents and make a mental note to avoid covering them. Never put cold liquids on a hot glass door. The sudden temperature shock can shatter the glass into a thousand pieces.
|
Prep Step |
How to Do It |
Pro Tip |
|
1. Cool Down |
Turn off power and gas. |
Ensure the interior is below 100 degrees Fahrenheit. |
|
2. Clear Out |
Remove racks and trays. |
Toss the racks in the tub for later. |
|
3. Chip Away |
Scrape big crusts with plastic. |
Never use metal scrapers on enamel. |
|
4. Sweep Up |
Wipe out the loose dirt. |
A vacuum hose makes this incredibly fast. |
Mixing the Magic Baking Soda Paste
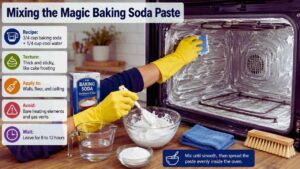
This is exactly where the real magic happens. If you want to successfully clean an oven naturally, you have to nail the paste consistency. Grab a small mixing bowl from your cupboard. Mix three-quarters of a cup of baking soda with a quarter cup of cool water. Stir it up vigorously. You want it to look and feel exactly like thick cake icing or toothpaste. If it is too runny, it drips down the walls and pools on the floor. If it is too dry, it simply will not stick to the grease.
Throw on some rubber gloves to protect your hands from the drying effects of the powder. Scoop up the thick paste and smear it everywhere inside. Coat the side walls, the bottom floor, and the ceiling. Pay special attention to the darkest grease splatters. Just stay completely away from the bare metal heating coils. If you cover those electrical elements in baking soda, they will smoke heavily the next time you cook.
Shut the door and go do something else. Let the paste sit for a minimum of 8 to 12 hours. This dwell time is non-negotiable. The chemical reaction needs hours to fully break down the tough triglycerides. Do not leave it longer than 14 hours. Leaving it too long can eventually dull the shine of stainless steel parts.
|
Paste Details |
What to Know |
|
The Recipe |
3/4 cup baking soda plus 1/4 cup cool water. |
|
The Texture |
Thick and sticky, like cake frosting. |
|
Where to Put It |
Walls, floor, and ceiling. |
|
What to Avoid |
Bare heating elements and gas vents. |
|
The Wait |
Leave it alone for 8 to 12 hours minimum. |
The Next Morning: Spray and Wipe
Twelve hours later, the baking soda paste will look pretty gross. It usually turns dark brown and chunky. That discoloration means it actually worked. The paste absorbed the heavy carbon and fat. Take a damp cotton cloth and wipe out all that dried sludge. Use your plastic spatula to gently pry up any spots where the paste hardened over a thick grease puddle. Keep rinsing your cloth in a bucket of warm water. You do not want to just smear the dirt around the walls.
You will definitely notice a white, powdery film left behind on the dark enamel. This is completely normal. Put straight white vinegar in a spray bottle and mist the whole interior. The vinegar will instantly foam up when it hits the powder. Take a fresh, wet cloth and wipe that satisfying foam away. Keep wiping until the dark enamel feels completely smooth to the touch.
Inspect your work under a bright light. You should not see any chalky residue left behind. If you leave baking soda dust inside, it will smoke the next time you bake a cake. Rinse your cloth with plain, distilled water for the final wipe down. This guarantees a mirror-like finish without any hard water streaks.
|
Morning Routine |
The Tool |
The Goal |
|
First Wipe |
Damp cotton cloth |
Remove the brown, greasy paste. |
|
Scrape |
Plastic spatula |
Pop off hardened grease chunks. |
|
The Spray |
Vinegar bottle |
Make the leftover powder foam up. |
|
Final Polish |
Clean wet cloth |
Wipe away foam until it shines. |
Rescuing Those Greasy Racks
Scrubbing massive metal racks in a tiny kitchen sink is a complete nightmare. Water splashes everywhere, and you end up ruining your sponges on the sharp metal grids. Take the fight to the bathroom instead. Lay some old, thick towels in the bottom of your bathtub. This crucial step ensures the hard metal racks do not scratch your delicate porcelain finish. Lay the greasy racks flat on the towels. Run enough piping hot water to cover them completely.
Squirt in a generous amount of liquid dish soap. Add half a cup of baking soda directly into the hot water. Swish the water around with your hand to mix everything up. Walk away and ignore them for at least four hours. The hot, alkaline water softens the burnt carbon rapidly. The grease literally lifts away from the metal joints.
Later that afternoon, grab a regular sponge or a non-scratch scouring pad. The loosened grease will slide right off with barely any physical scrubbing required. Rinse them off cleanly under the showerhead. Dry them thoroughly with a towel so they do not rust. Slide the sparkling clean racks back into your kitchen appliance. Note that you should not use this method on raw aluminum racks, as baking soda can discolor aluminum.
|
Rack Cleaning |
The Good |
The Bad |
|
Bathtub Trick |
No hard scrubbing; fits huge racks easily. |
Ties up your shower for a few hours. |
|
Trash Bag Method |
Keeps the soapy mess hidden inside a bag. |
Requires heavy-duty outdoor trash bags. |
|
Sink Scrubbing |
Fine for a quick, light clean. |
Huge mess; ruins countertops. |
Getting the Glass Door Spotless
You absolutely need to be gentle with the glass viewing window. Deep scratches look terrible and they physically weaken the tempered glass. Mix up a slightly thinner batch of baking soda paste for this area. Rub it all over the inside of the window, avoiding the metal trim. You do not need to wait overnight for the glass. Let it sit for just 30 to 60 minutes. Wipe it away in tight, circular motions with a wet cloth.
Sometimes you get hard, raised brown dots of burnt sugar or fat that simply will not budge. Grab a flat razor blade from the hardware store. Keep the glass very wet with soapy water. Hold the blade flat at a 45-degree angle. Gently slide it right under the grease spots to pop them off. Never use aggressive steel wool pads on the glass.
Many modern doors have air vents located along the top edge. Be extremely careful not to push wet paste into these open vents. If paste drips down between the dual glass panes, it is incredibly annoying to clean out. Finish the job by spraying a mix of vinegar and water on the glass. Wipe it dry with a clean microfiber cloth to completely eliminate streaks.
|
Glass Care |
How to Do It |
Watch Out For |
|
The Paste |
Use a thinner paste for 30 mins. |
Keep paste out of the door vents. |
|
The Wipe |
Rub in circles with a soft cloth. |
No steel wool allowed. |
|
The Scrape |
Use a flat razor on hard spots. |
Keep the glass wet so it does not scratch. |
|
The Polish |
Spray with vinegar and water. |
Use a microfiber cloth to avoid lint. |
The Quick Lemon Steam Trick
If things are not incredibly dirty, you do not need a massive overnight scrub session. The lemon steam trick is my absolute favorite shortcut for handling light, fresh splatters. Grab an oven-safe ceramic bowl and pour in an inch of tap water. Cut two fresh lemons in half. Squeeze the juice directly into the water. Toss the squeezed lemon rinds straight into the bowl, too. Put the bowl inside, set the heat to 250 degrees Fahrenheit, and shut the door.
Let it run for exactly one hour. The water will boil and fill the inside cavity with hot, citrus-infused steam. The natural citric acid from the lemons works aggressively on fresh grease. It melts light splatters instantly. Turn the heat off and do not open the door. Let it cool down slowly so the steam stays trapped inside.
Once the walls are cool enough to touch safely, just wipe them down with a wet rag. The grime wipes away without any scrubbing. As a massive bonus, your entire kitchen will smell incredible. The lemon oils act as a natural deodorizer. It completely eliminates the lingering smell of burnt fish or roasted garlic from your house.
|
Lemon Trick |
Best For |
Do Not Do This |
|
The Setup |
2 lemons, water, heat-safe bowl. |
Never use a standard glass bowl. |
|
The Bake |
250 degrees Fahrenheit for an hour. |
Do not open the door and let the steam out. |
|
The Payoff |
Melts light grease; smells amazing. |
Won’t fix thick, black crusts. |
How to Stop the Mess Before It Starts?
I absolutely hate scrubbing heavy messes. The absolute best way to clean an oven naturally is to stop making it dirty in the first place. You can cut your cleaning time in half by adopting a few lazy habits. If I bake a fruit pie or a bubbly cheese casserole, I always put a cheap baking sheet on the rack below it. The sheet catches all the boiling drips before they hit the floor and burn into a solid rock.
If something does spill on the bottom floor, I wait for it to cool down just a bit. While the grease is still warm but safe to touch, I dump a massive handful of table salt right on top of the wet puddle. The salt rapidly absorbs the liquid fat. The next time things heat up, that salty spill turns into a dry, crumbly ash. You can literally just sweep it into the trash can with a paper towel.
You can also try the clean-as-you-go method. Apply a quick baking soda paste immediately after roasting a chicken. Apply it while the interior is still slightly warm, around 100 degrees. The residual heat speeds up the chemical reaction. This simple trick cuts the required dwell time down by three whole hours.
|
Lazy Prevention |
When to Do It |
Why It Works |
|
Quick Wipes |
After cooking a messy meal. |
Stops grease from hardening. |
|
Catch Trays |
When baking pies or casseroles. |
Catches the mess before it burns. |
|
The Salt Trick |
Right after a fresh spill. |
Soaks up wet fat so it turns to ash. |
|
Quick Paste |
While the interior is still warm. |
Cuts the cleaning dwell time down drastically. |
Final Thoughts
You do not need to subject yourself or your family to harsh fumes just to keep your kitchen spotless. You already have the tools sitting in your cupboards. Baking soda and vinegar are cheap, safe, and wildly effective if you just give them time to work.
The next time you smell something burning while you’re roasting potatoes, skip the aerosol cans. Mix up a little paste, let it sit overnight, and wipe the grime away in the morning. Your food will taste better, your lungs will thank you, and you won’t have to worry about grease fires.
Frequently Asked Questions (FAQs) About Clean Oven Naturally
Can I put baking soda in and run the self-cleaning cycle?
No. Never do this. The self-cleaning cycle hits 1,000°F. If you leave baking soda in there, it will permanently fuse into the enamel. Your appliance will be ruined. Always wipe out the paste by hand.
Honestly, repair guys hate that button. The insane heat often blows thermal fuses and fries the electronic control boards. Worse, if you have a lot of grease in there, hitting that button can literally start a fire. Scrub it yourself. It’s cheaper than buying a new appliance.
How do I clean the rubber gasket on the door?
Be super gentle here. That rubber seal keeps the heat trapped inside. Don’t scrub it with baking soda or heavy sponges. Just take a rag with warm water and a tiny bit of dish soap and gently wipe it down. Do not pull or stretch it.
Grease dripped between my glass panes. Now what?
This is the most annoying design flaw ever. Grease drips down the air vents at the top of the door. You usually have to unscrew the top panel of the door to get inside. I wrap a microfiber cloth tightly around a wire coat hanger and slide it down the gap to wipe it clean. Check your manual first.